
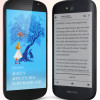
Review: YotaPhone 2
There are several ways to use the e-ink screen, and how you do so is entirely up to you. It does have some limitations, however, that you should be aware of ahead of time.
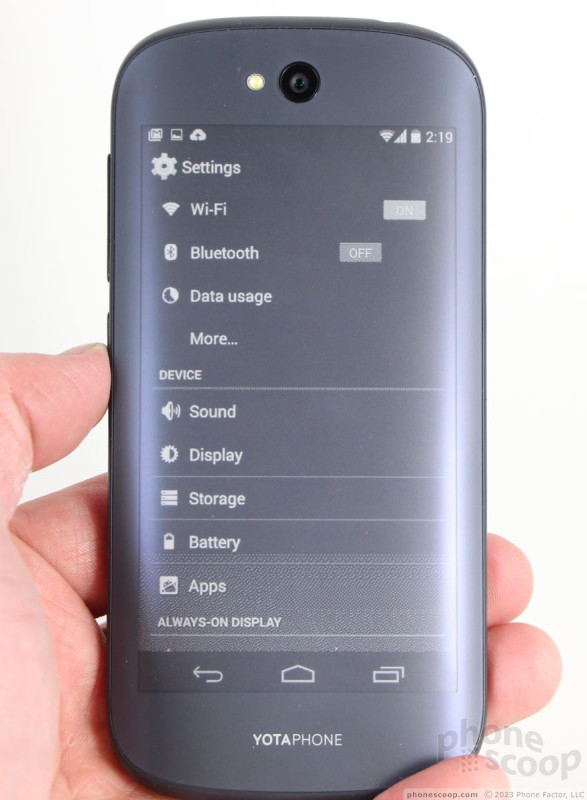
Settings/UI
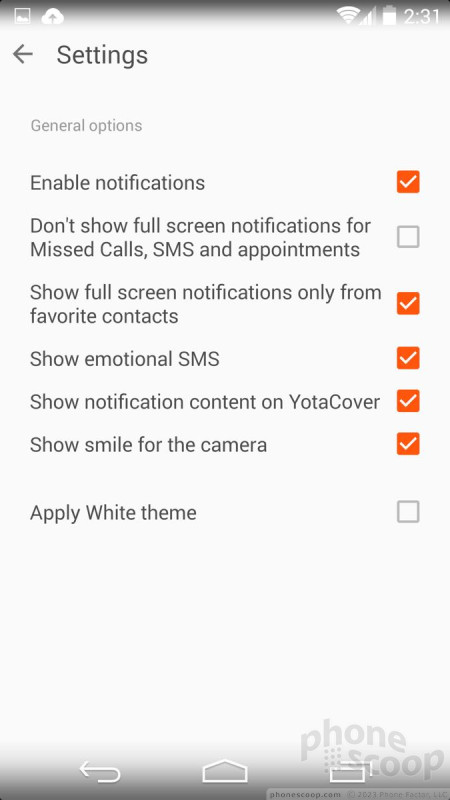
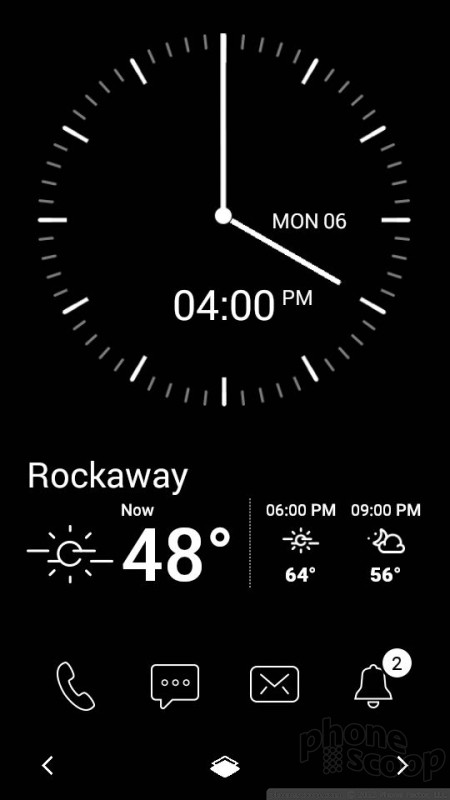
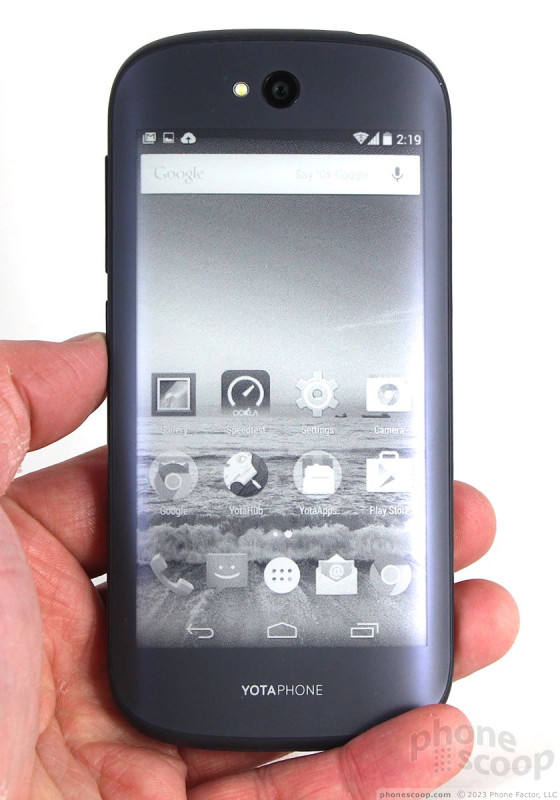
There are three main functions of the e-ink display: Yota Cover, Yota Panel, and Yota Mirror. The Panel provides all sorts of widget-based information and the Cover is a way to obscure the Panel if you're worried about privacy. Both are managed with a tool found in the settings and app menus called Yota Hub. It's pretty easy to manage them and Yota offers a handful of animated tutorials to help you learn the ins and outs of the Always-On Display.
The user interface is a little bit janky. You'll notice a control strip at the bottom of the screen with left and right arrows, and a home button in the middle. You can use these controls to move through the e-ink UI, or you can simply swipe left and right across the screen. The home button will always bring you back to the main screen with a short press. A long press opens up a secondary tool for other functions, such as capturing screen shots and Yota Mirror.


Yota Cover
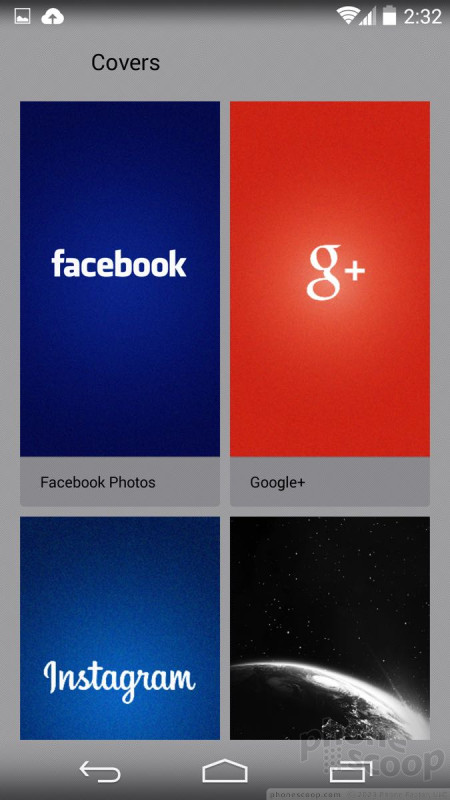
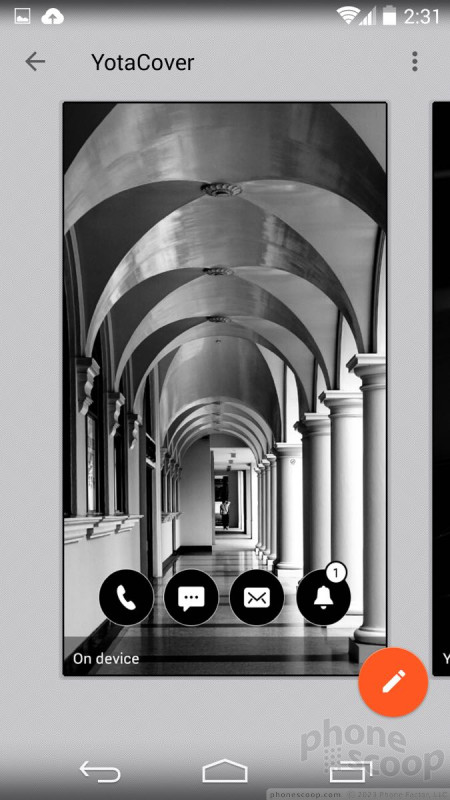
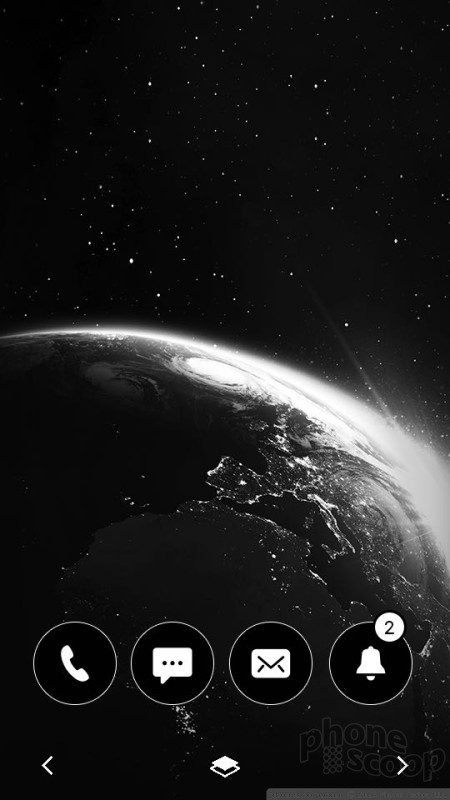
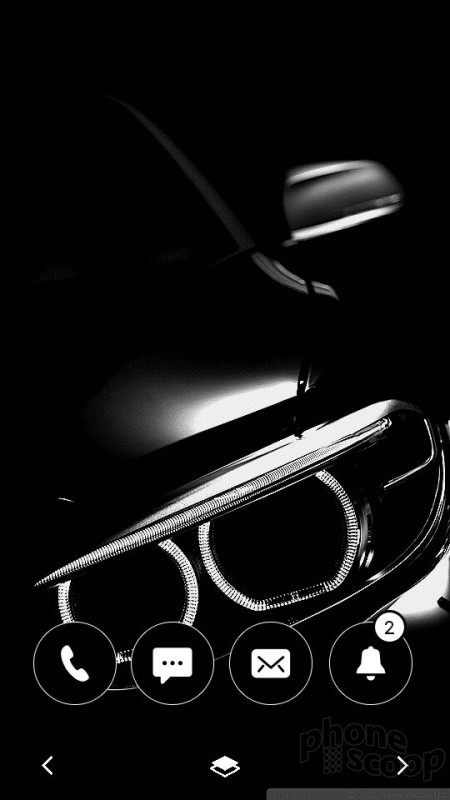
It's best to think of the Yota Cover as the lock screen for the Yota Panel. It essentially acts as a black-and-white wallpaper with some base level notifications. The phone has a wide range of wallpapers for the phone (with access to more online) and you can set them to remain static or to change as often as you wish. In addition to those supplied by Yota, you can link the Covers function to your Instagram or Google+ feed so you can see the photos shared via your social networks. I like the concept, since the Covers act as an always-visible wallpaper.
Notifications here are a mixed bag. There are four permanent icons at the bottom of the screen (phone, messages, email, alerts). If and when there's an incoming call or message, these notifications will flash a banner across the bottom of the screen. If you've missed the call/message, the little icon will add a number so you know there's something in your inbox. What I find most frustrating is that this little set of icons can't be customized. For example, it only works with the “Email” app, and not the Gmail app. This is maddening.
The Yota Cover screen is technically locked, so you need to swipe up to unlock it. Only then can you interact with the notifications at the bottom of the screen. Let's say you have a missed call. Tap the phone icon and, rather than showing you the call log on the e-ink screen, it instructs you to turn the phone over and open the phone app on the main screen. Ditto for the messages, email, and alerts icons. With Yota Cover active, you can't see the clock or other widgets available on the Yota Panels. You have to unlock the back cover and then swipe over to see your Yota Panel information. This negates the purpose of the panels entirely as far as I am concerned.

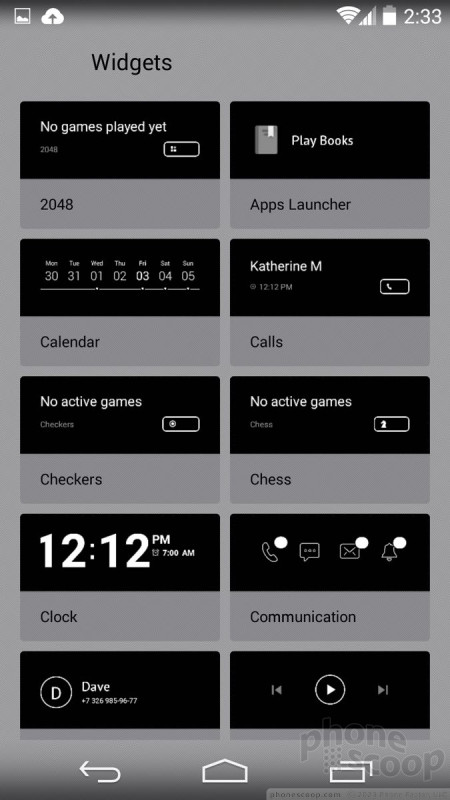
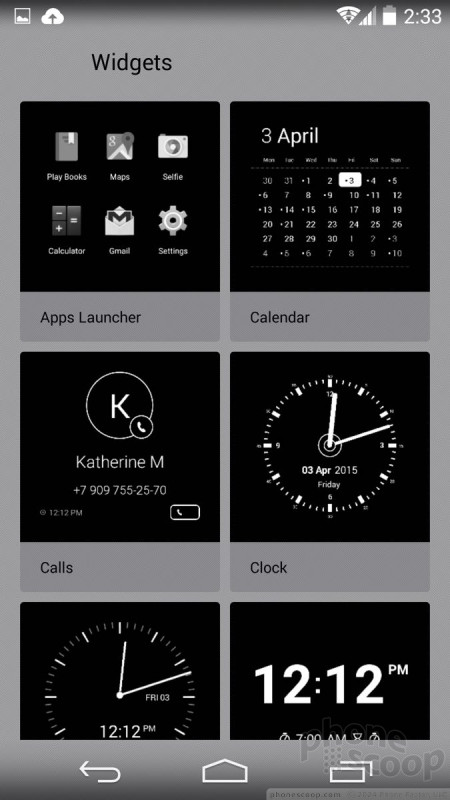
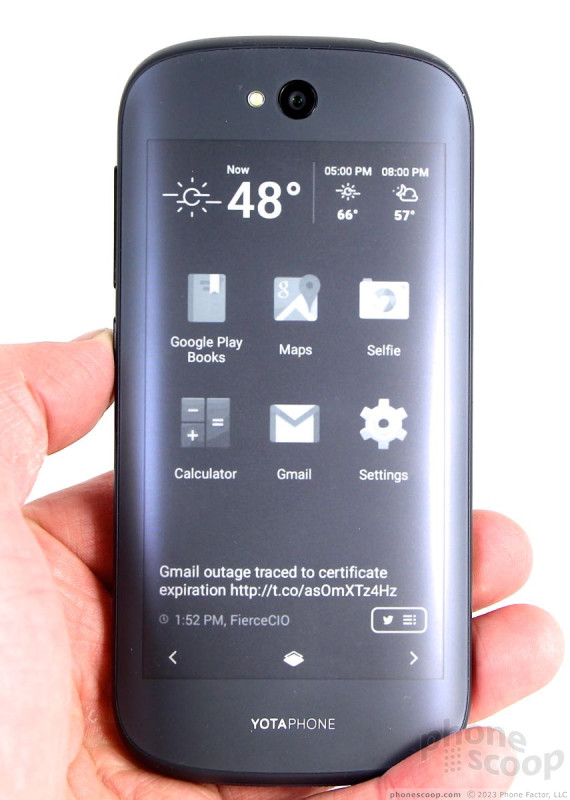
Yota Panels
The Panels are far more useful than the Yota Cover. The Panels encapsulate the basic idea behind regular Android home screen widgets, but are meant to do so in a way that draws less power.
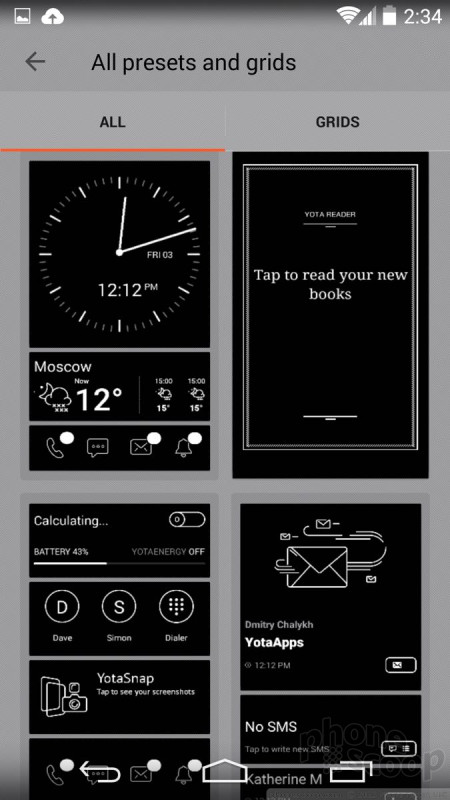
Yota loaded the Y2 with 14 preconfigured panels that offer a mix of information, such as calls, calendar appointments, messages, emails, and so on all arranged in various grids. It's quite easy to activate a handful of these preconfigured panels without much effort.
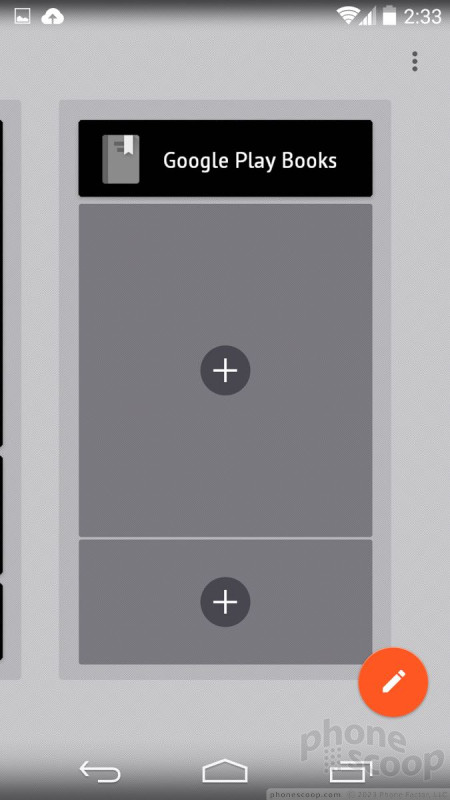
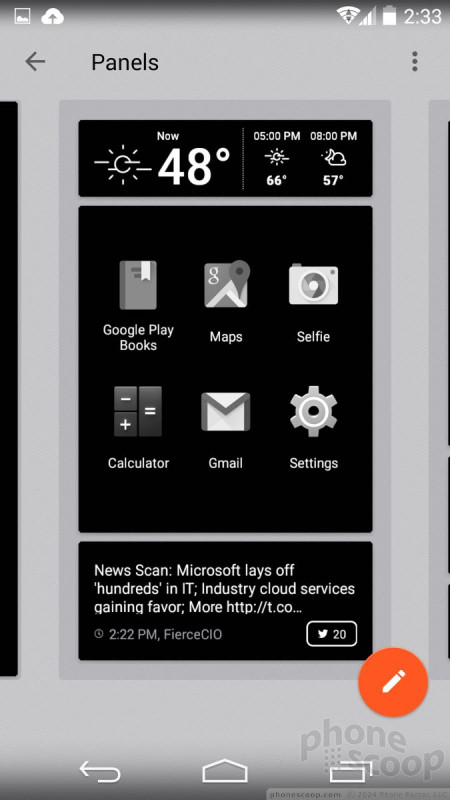
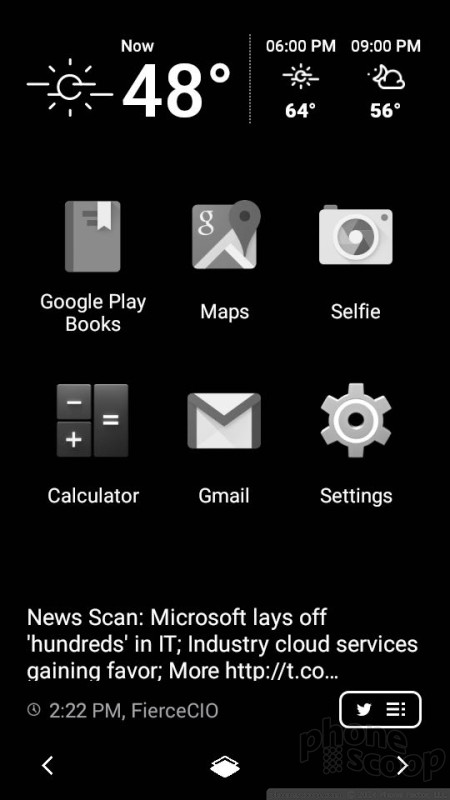
If you'd prefer to design your own panels, you can do that too. The Yota Hub makes it a breeze to put together custom widget panels with different grid shapes and sizes. You simply pick the basic grid for the page and then fill in the blanks with any of about three dozen or so widgets. For example, one grid has narrow bands at the top and the bottom, and a large open space in the middle. I put a big clock widget in the middle, a smaller missed calls widget on top, and the weather on the bottom. The possibilities here are really endless.
There are also several full-screen apps available from Yota, including one for the music player and a book reader. Yota was generous enough to preload a handful of classic novels that you can read right out of the box.
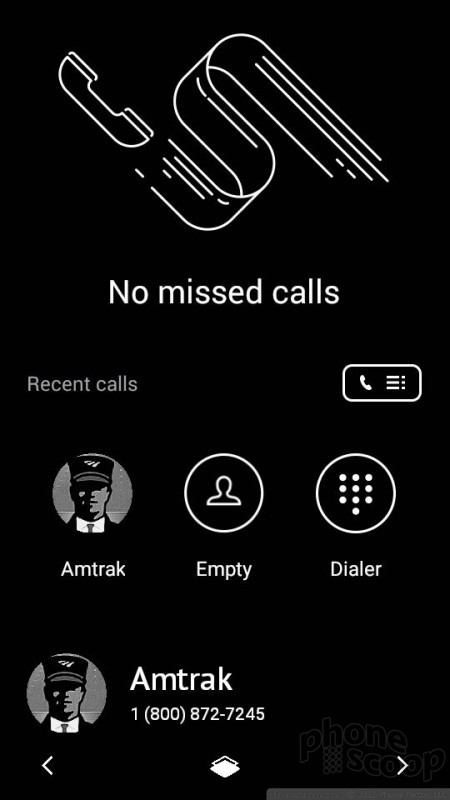
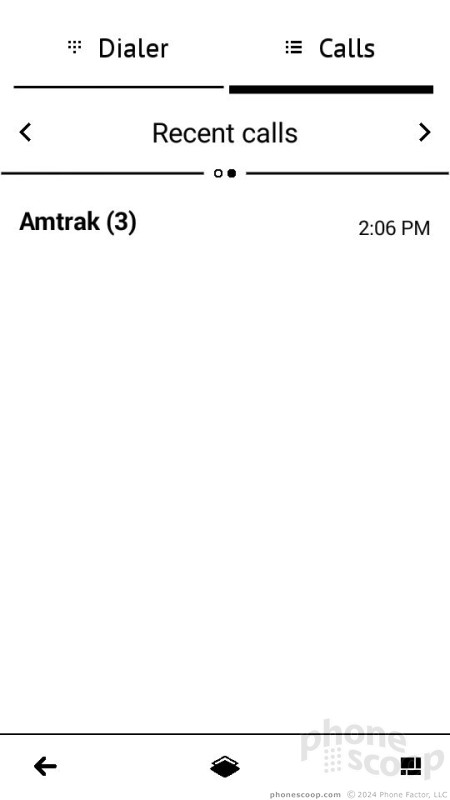
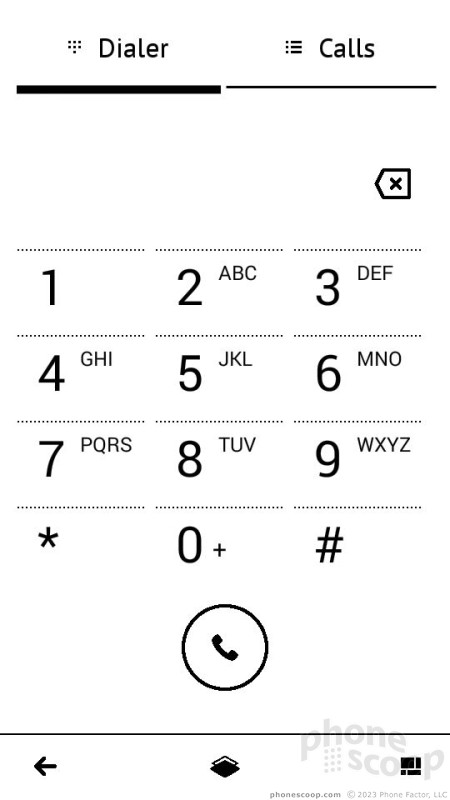
The widgets sometimes do little more than provide basic information and/or updates, but others can be opened into full apps. For example, there are several phone widgets for the Panels that let you open the call log, open the dialer, sort through your contacts, and make/receive phone calls all from the e-ink screen. The messaging, calendar, email, Twitter, and music widgets all have such powers.

Yota Mirror
This is perhaps the crux of the entire phone. With Yota Mirror, you can flip the entire Android UI from the main screen to the back screen. In order to activate Yota Mirror, you have to press the home button and slide your finger up. Doing this brings up a sub-menu with three options: an "X", Google Now, and screen shot. If you want the Android UI to appear on the e-ink screen, select the "X". This is hardly intuitive.
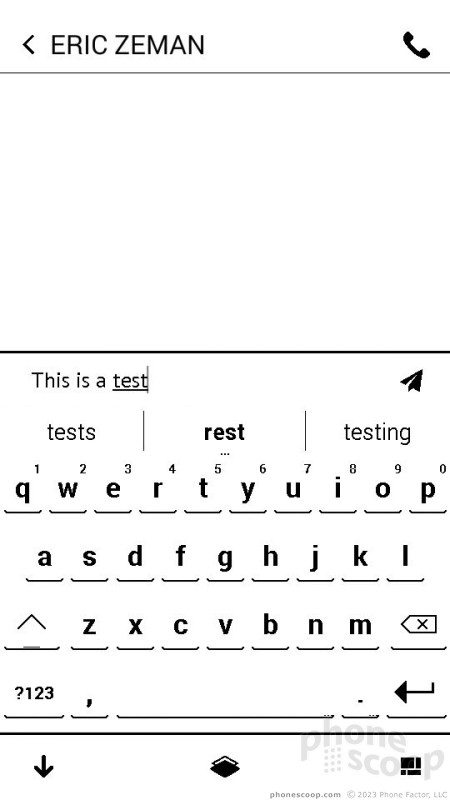
Using Yota Mirror — and skipping the main LCD entirely — lets you extend battery life to days if you choose to interact with your phone only on the e-ink screen. The caveat here is of course that you're interacting with a black-and-white version of Android. I found some of the app icons sort of bleed together, and if you have busy home screen panels they can be hard to decipher.

Yota Snap
Yota has cooked up its own take on the screen shot. First, you can take screen shots on the main screen in the regular way (hold down lock button and down volume button at the same time). On the e-ink screen, press-and-hold the home button to bring up the sub-menu, and you can take a screen shot of the e-ink screen. Last, but not least, you can access the sub-menu — by swiping up when using the main screen — to capture a shot of whatever is on the main LCD. If you do this, the screen shot flips over to the e-ink screen.
Why would you do this? Yota envisions a scenario in which your battery is on its deathbed and you need to show the gate agents your boarding pass to get on your plane. It suggests you use Yota Snap to take a screen shot of your boarding pass, which will then show up on the e-ink display, saving your battery and letting you board the plane.
It's a screen shot tool.
Performance
There is one major point worth discussing, and that's how e-ink displays work. If you've ever used a Kindle or other e-paper display, you know that they flicker a lot and are rather slow. That goes for the YotaPhone 2, as well. Navigating between screens is herky-jerky, and the screen will flicker almost every time you touch it. This is simply a limitation of the technology involved in e-ink displays.
Also, the back of the YotaPhone is not as responsive to input as the main screen, so you can expect to press some things twice.
The e-ink screen is helpful in saving battery life if you use it a lot, but the trade-off is that it doesn't have the same smooth performance as the main screen. This is something you have to know going into the YotaPhone 2.
 Hands-On: YotaPhone
 YotaPhone Upgraded With Full Touch, Better Specs
 Yota Debuts White YotaPhone, Pushes Lollipop
 YotaPhone's Improved Dual-Screen Smartphone Goes On Sale
 Yota YotaPhone 2


